Checking NVMe Drives Using nvme-cli
12 Jul 2026, 03:48:14
nvme-cli is a utility designed for diagnosing and managing NVMe SSDs directly through the NVMe interface. Although smartctl (a popular disk-testing utility) has successfully displayed information about many modern NVMe drives since version 7.0, it provides only a small portion of the key data. For most users, this will be sufficient, but if you need complete information about an NVMe drive, nvme-cli is indispensable.Many hardware manufacturers provide their own proprietary utilities for device diagnostics (Intel MAS, Samsung Magician, etc.), but not all of them are available for Linux systems. nvme-cli serves as a full-fledged replacement for them, as it implements nearly all the diagnostic capabilities of the NVMe interface and works with all popular NVMe SSD models.
Installing nvme-cli
The nvme-cli utility has already become an industry standard and is available in the repositories of many modern Linux distributions. All commands in this article are executed on a dedicated server as the root user. If you are logged in as a regular user, you may need to use sudo before the main command.Debian and Ubuntu
apt install nvme-cliRHEL, AlmaLinux, CentOS
dnf install nvme-cliArch Linux
pacman -S nvme-cliIf the installation was successful, running this command will display the program version:
nvme version
Displaying NVMe Drives
To view information about all NVMe devices on the server, use the following command:nvme list
Let's look at the fields:
| Node | NVMe drive name |
| SN | serial number |
| Model | device model |
| Namespace | number namespace |
| Usage | amount of space used |
| Format | logical sector size |
| FW Rev | firmware version |
What Is a Namespace on NVMe Drives?
In the traditional sense, a server’s disk system architecture consists of disks that are divided into partitions on which file systems are installed. However, with NVMe drives, a new layer appears between the disk and the partition, managed by the drive’s NVMe controller itself. This allows a single device to be divided into multiple independent storage volumes, which the operating system will recognize as separate disks. This provides a full level of isolation.Each namespace has its own:
- volume;
- sector size;
- logical address space;
- formatting;
- NSID identifier.
Controller Information
You can display complete information about the NVMe drive controller's specifications using the following command:nvme id-ctrl -H /dev/nvme0- /dev/nvme0 - NVMe device name.
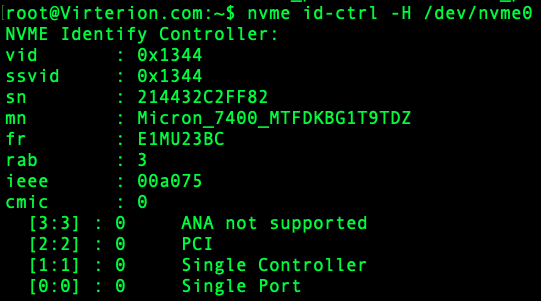
However, don't expect to find the controller model here. You'll need to look for that information in the manufacturer's documentation.
Get SMART Data
Diagnosing an NVMe drive begins with reviewing the SMART data collected by the controller. To view this data, use the following command:nvme smart-log /dev/nvme0- /dev/nvme0 - NVMe drive name.
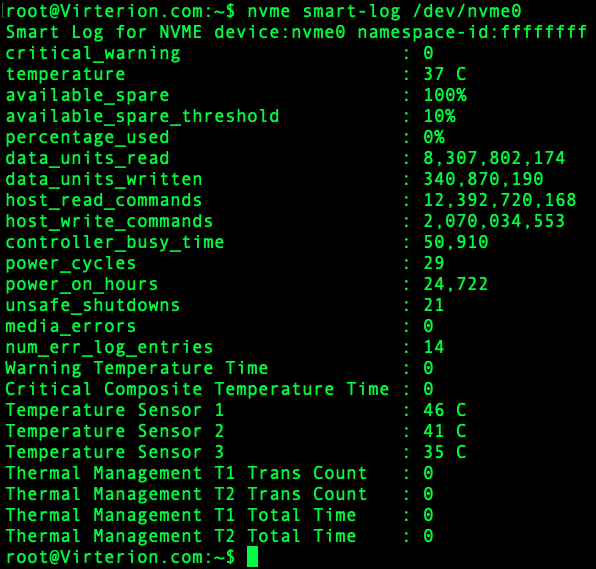
Let's look at the meanings of all the fields in the utility's output:
| critical_warning | a bit mask indicating the current disk status (0 - critical status not active) |
| temperature | disk temperature (50–70°C is normal for most devices) |
| available_spare | percentage of available reserve blocks |
| available_spare_threshold | warning threshold (the controller will report a problem if the percentage of free reserve blocks falls below this threshold) |
| percentage_used | estimated disc wear (0% - disc is like new) |
| data_units_read | how much data has been read from the disk since it began operating (in special units - Data Units (512 KB)) |
| data_units_written | how much data has been written (similar to data_units_read) |
| host_read_commands | number of read commands executed |
| host_write_commands | number of write commands executed |
| controller_busy_time | total time spent by the controller processing requests |
| power_cycles | number of turns |
| power_on_hours | number of working hours |
| unsafe_shutdowns | number of emergency shutdowns |
| media_errors | number of irreversible read/write errors on the medium and data integrity |
| num_err_log_entries | number of entries added to the disk error log |
| Warning Temperature Time | how long did the disk temperature exceed the warning threshold |
| Critical Composite Temperature Time | how long did the disk temperature exceed the critical threshold |
| Temperature Sensor 1, 2, 3 | temperature sensor readings |
| Thermal Management Trans Count | number of instances of temperature throttling at different levels |
| Thermal Management Total Time | how long has the SSD been operating at different throttling levels |
Displaying the NVMe drive error log
You can view the disk error log using the following command:nvme error-log /dev/nvme0Depending on the device manufacturer, you may encounter a situation where the log contains a lot of information but no errors: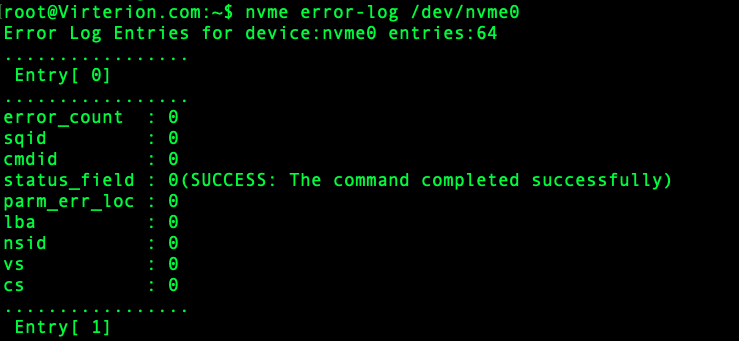
The output will be full of entries like these, but they will all have error_count: 0 and status_field: SUCCESS. This does not indicate a problem, even though num_err_log_entries may not be equal to 0, as in the example. This means that some errors were logged while the drive was in operation, but they likely occurred a long time ago, and the log has since been cleared. If all entries in the log have an error_count of 0, you can assume that the NVMe device currently has no active errors.
Self-Tests on NVMe SSD
The nvme-cli utility allows you to run two types of self-tests, similar to smartctl: Short self-test and Extended self-test. The Short self-test checks selected NAND memory blocks, the ECC mechanism, and controller operation. The Extended self-test checks all memory channels, a larger number of NAND blocks, ECC, and much more. The diagnostic mechanism and components are determined by the device manufacturer; nvme-cli merely issues the command to start the test, while the test itself is performed by the drive’s controller.To run the Short self-test, use the following command:
nvme device-self-test /dev/nvme0 -s 1- /dev/nvme0 - the name of your NVMe device;
- -s - self-test code (1 for short self-test).
nvme device-self-test /dev/nvme0 -s 2As a result, a notification about the start of the test:
To stop the test, use the following command:
nvme device-self-test /dev/nvme0 -s 15You can view the test results in the self-test log:nvme self-test-log /dev/nvme0Log Output Format
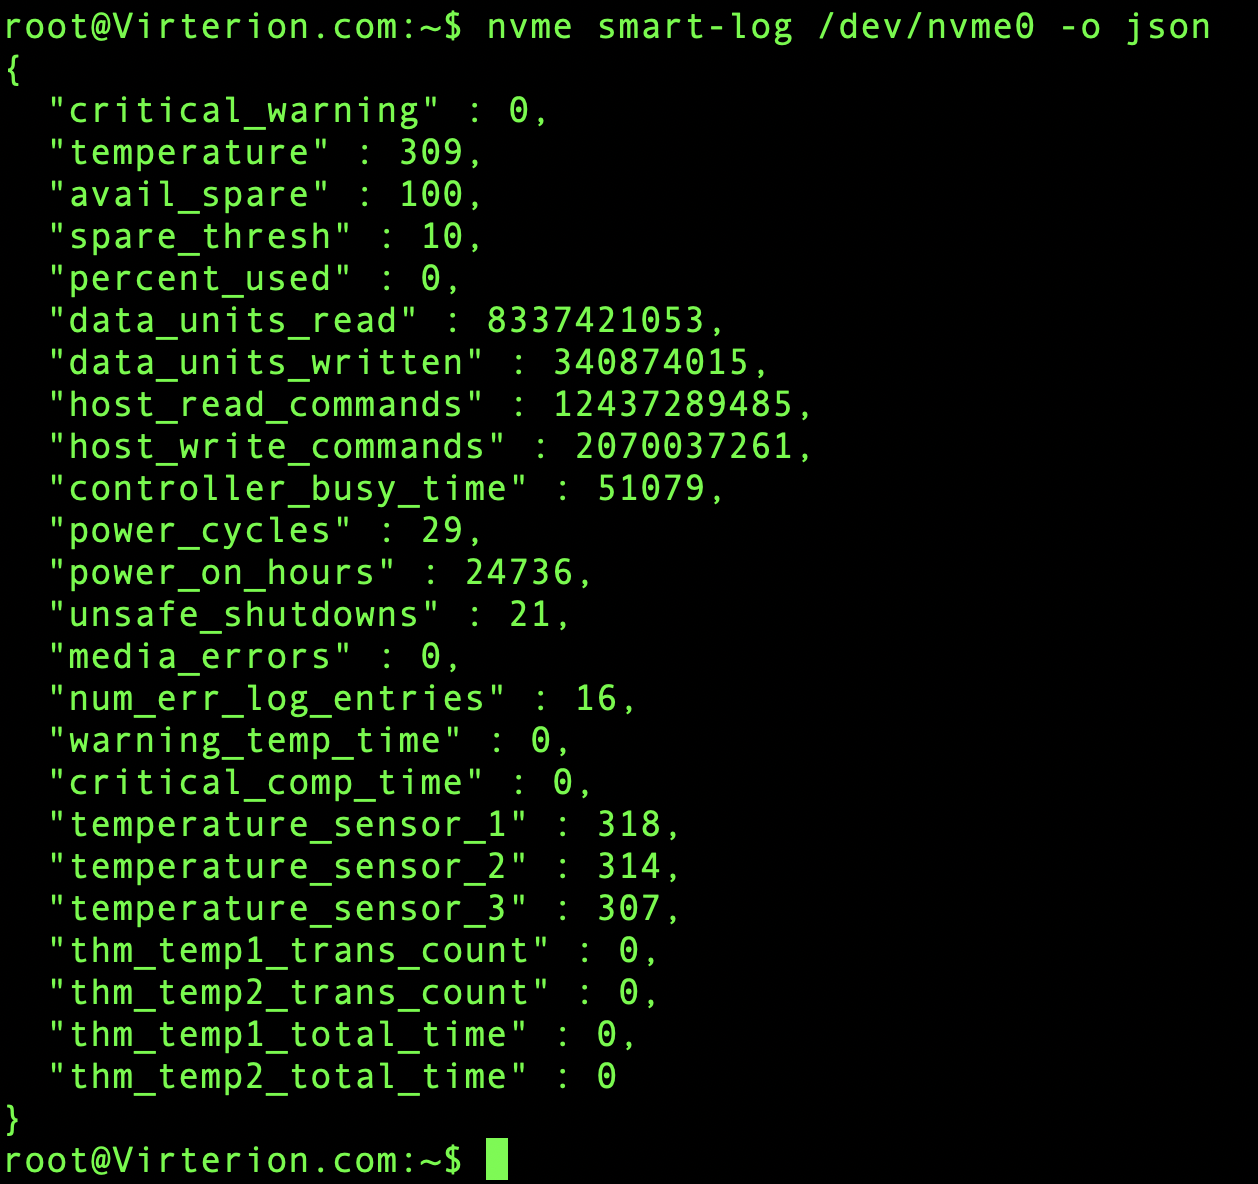
nvme-cli can display any requested log in three formats: human-readable (default), JSON, and binary. The binary format is not supported for all command types. To specify the output format, use the -o option:nvme smart-log /dev/nvme0 -o json- -o - output format (normal, json and binary).
Conclusion
nvme-cli is a specialized program for working with NVMe devices in accordance with the NVMe standard specifications. smartctl is a versatile utility that works with various types of storage devices. Both tools are essential for managing dedicated servers. Understanding their capabilities will help you diagnose issues with your devices and, potentially, recover your data.If you are a Virterion.com customer, you don’t need to worry about how nvme-cli works. You can contact our technical support team to have the drives on your dedicated server checked.