Installing Redis on Ubuntu 24.04 LTS
29 Jul 2026, 04:03:51
Redis is a popular Key-Value database known for its high performance, which stores data in RAM (In-Memory Database). Redis has proven itself as:- an advanced caching system;
- a message broker;
- a queue manager.
In this article, we will walk through installing the latest version of Redis on Ubuntu 24.04 LTS from the application's official repository. We will examine some parameters of the Redis configuration file, verify the server's functionality, and implement basic security recommendations. Ubuntu 24.04 LTS ships with Redis 7.0.x in its official OS repositories; newer versions of the software are available through the official Redis repository, which we will use.
Installing Redis
All commands in this article are executed on a dedicated server from Virterion.com as the root user. If you are logged in as a regular user, some commands will require the use of sudo.Add the GPG key to verify the package's digital signature:
curl -fsSL https://packages.redis.io/gpg | gpg --dearmor -o /usr/share/keyrings/redis-archive-keyring.gpgAdd the Redis repository:echo "deb [signed-by=/usr/share/keyrings/redis-archive-keyring.gpg] https://packages.redis.io/deb $(lsb_release -cs) main" | tee /etc/apt/sources.list.d/redis.list
Update the package list using the following command:
apt updateNext, we install Redis:apt install redisAlong with redis, the redis-tools package will be installed, which includes the redis-cli and redis-benchmark utilities, among others, that we'll use later on.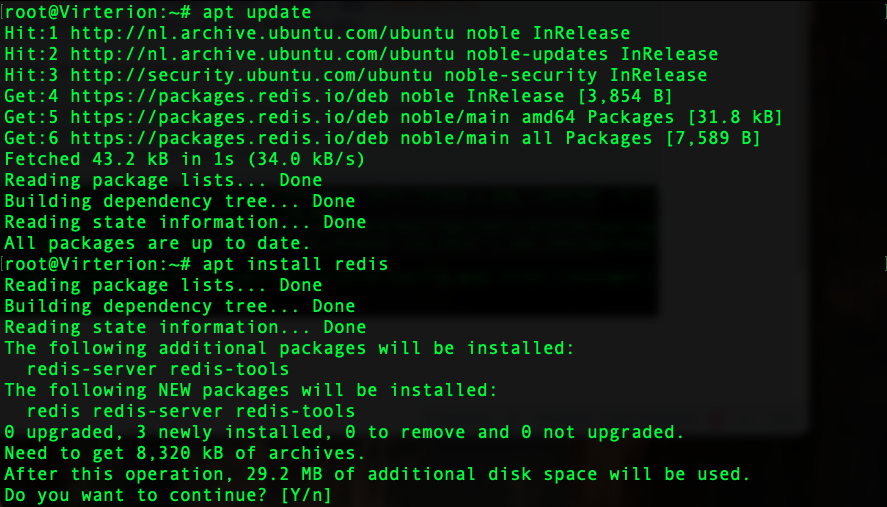
Testing Redis
You can check the status of the Redis server using the following command:systemctl status redis-server.serviceBy default, the service is already running and has been added to startup.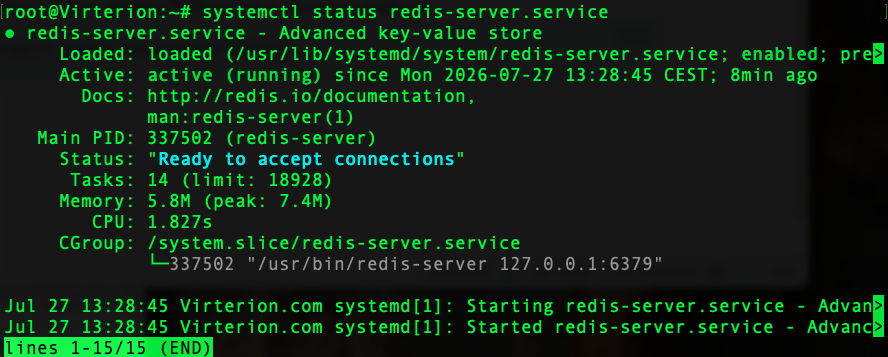
To restart the Redis server, use the standard systemd command:
systemctl restart redis-server.serviceTo stop:systemctl stop redis-server.serviceTo view the service log, you can use the journalctl command:journalctl -u redis-serverConnecting to Redis from the console
Let's use the redis-cli utility to connect to Redis. Since the Redis server is currently running locally on the default port (6379), we can simply run the program without any parameters:redis-cliNext, we'll enter the command to check the connection:PINGYou can also display server information: check the Redis version and more.INFO server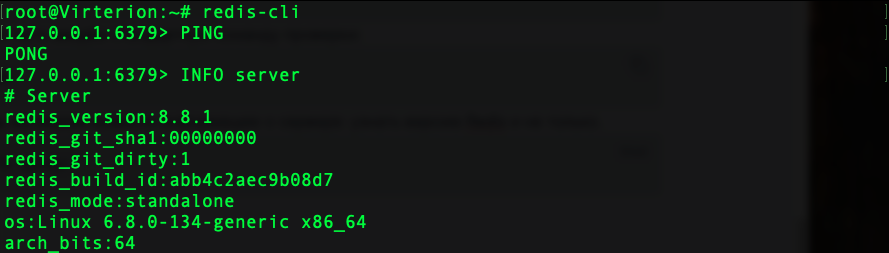
To exit redis-cli, use the following command:
exitYou can check the Redis server version without using redis-cli by running the following command:redis-server --version
Redis Configuration File
The main Redis server configuration file is located at: /etc/redis/redis.confYou can open and edit it using the following command:
nano /etc/redis/redis.confMain Configuration Parameters
| bind | The IP address(es) that redis-server is listening on (default: 127.0.0.1) |
| protected-mode | A secure mode in which Redis will not allow remote clients to connect unless a password or ACL is configured (default: yes) |
| port | Redis port (default: 6379) |
| tcp-backlog | TCP connection queue size |
| timeout | The client connection timeout period, after which the connection will be terminated |
| loglevel | Log detail level (ranging from debug - the most detailed, to nothing - logging disabled) |
| databases | Number of Redis databases |
| hide-user-data-from-log | Hide user data in Redis logs |
Memory Usage Limit
The maxmemory parameter in the /etc/redis/redis.conf configuration file sets the maximum amount of RAM used for data storage. By default, it is commented out, and the program is limited only by the system's free memory. However, if you run multiple services on the same server and the server has a small amount of RAM, it makes sense to set this parameter. This should primarily be done because Redis manages memory on its own in a "proper" way, without emergency shutdowns, according to the specified maxmemory-policy. If Redis uses all the system's available memory, it may fall under the scope of the OOM Killer, and the program's process will be abruptly terminated.You can start with a value equal to half the RAM (this is a custom value that depends on the server's software configuration):
maxmemory 4gbWhen setting the maxmemory parameter, you must specify a value for maxmemory-policy. The default value is noeviction, which returns an error when attempting to add new data and the specified memory limit is reached. This is not the best option. The two optimal options are:- allkeys-lru - deletes the keys that have not been accessed for the longest time;
- allkeys-lfu - deletes the keys that were used the least (based on the number of queries).
maxmemory-policy allkeys-lfuAfter modifying the Redis configuration file, you must restart the service:systemctl restart redis-server.serviceYou can view information about memory usage in Redis using redis-cli:redis-cli INFO memoryThe output contains a large amount of information. We are interested in used_memory_human, used_memory_rss_human (the amount of physical memory allocated to the process), and used_memory_peak_human (the maximum memory usage since the service was started). You can also see the current values for maxmemory and maxmemory_policy there.
Setting a Password for Redis
To enable access to Redis with a password, you must add the requirepass parameter to the configuration file /etc/redis/redis.conf. This parameter remains functional and valid for private use; however, starting with Redis 6, it is recommended to use the ACL mechanism, which allows you to create users with different access rights.requirepass YOUR_PASSWORD- YOUR_PASSWORD - Redis password.
systemctl restart redis-server.serviceYou can check that authentication is working using the following command:redis-cli PINGThe following error will be displayed in response:
To connect successfully, use the -a option with redis-cli:
redis-cli -a YOUR_PASSWORD PING- YOUR_PASSWORD - Redis password.

Displaying a password in plain text is bad practice. Even the redis-cli utility itself warns against this. To avoid this, you can authenticate after starting the client.
Run redis-cli:
redis-cliMake authentication:AUTH YOUR_PASSWORDWe receive a message confirming that the command was successfully executed: